Installing Bollards using Anchor Castings
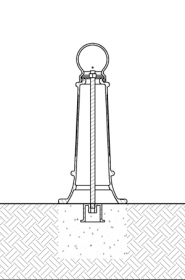
Decorative bollards can be installed in new concrete with an embedded anchor casting. These bollards may be used to define architectural perimeters, create architectural highlights, and act as visual traffic guidance devices. By placing an anchor casting and pouring concrete around it, a bollard can be easily installed with Reliance Foundry’s mounting hardware.
Alternatively, decorative bollards may be installed on surfaces not entirely composed of concrete. In this installation method, the anchor casting is placed in a concrete form. The concrete is then poured and contained inside the form without disturbing the surrounding area. This installation technique provides little impact resistance and is only recommended for bollards that enhance environments, decorate landscapes, or highlight architecture.
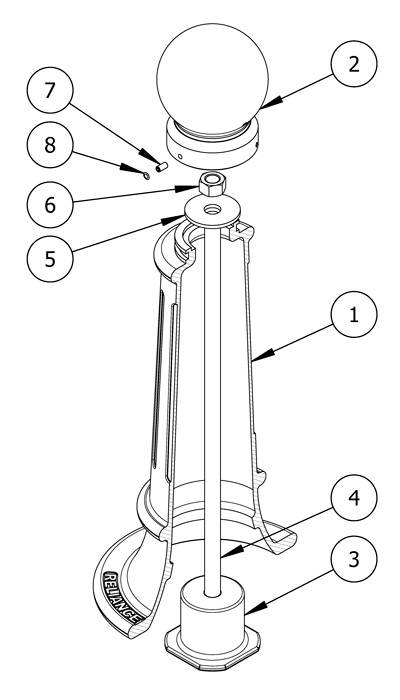
PARTS LIST
|
# |
PART |
QTY |
|---|---|---|
|
1 |
Bollard Base |
1 |
|
2 |
Bollard Cap |
1 |
|
3 |
Anchor Casting 1" (includes a plug covering top hole) |
1 |
|
4 |
Threaded Bar 1" |
1 |
|
5 |
Washer 1" |
1 |
|
6 |
Hex Nut 1" |
1 |
|
7 |
Hexagon Socket Set Screw |
3 |
|
8 |
Plastic Polyethylene Plug |
3 |
INSTALLATION EQUIPMENT
|
3/16" Allen Key |
Duct Tape |
|
1-1/2" Wrench |
Measuring Tape |
|
Dirt Tamper |
Tubed Concrete Form (For concrete form method) |
|
Chalk/Marker (For concrete form method) |
|
NOTE
- To protect the finish, keep bollards in original packaging until the exact moment of installation.
- Handle with care to avoid scratching or damaging bollard surfaces as abrasions will lead to rust.
- Once scratched, bollards cannot be repaired to original form without re-finishing the entire surface.
Before installation
Study the site plans
Site plans are generally created by the architect of the project.
The architect will mark the intended location of each bollard on the plan.
Ensure that the plan coincides with the site and familiarize yourself with the intended arrangement of the bollards.
Prepare the site for concrete
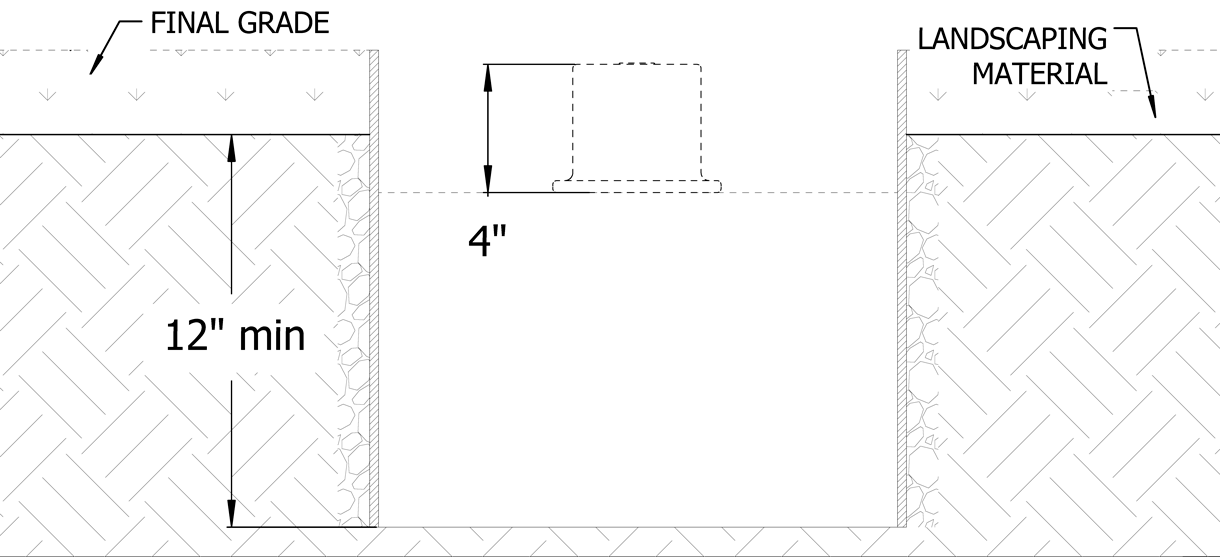
Please consult your local Building Code Department to determine the recommended digging depth below the frost line in your area. The new concrete footing must reach this recommended digging depth.
Note: If the frost line is less than 12″ below surface level, dig to a minimum depth of 12″. This is recommended in order to create stability.
The diameter of the hole differs based on the bollard model. Refer to product drawings to determine specific measurements.
Note: If you are installing using a concrete form, skip to the section on “Using a concrete form.”
For new concrete
Dig the site
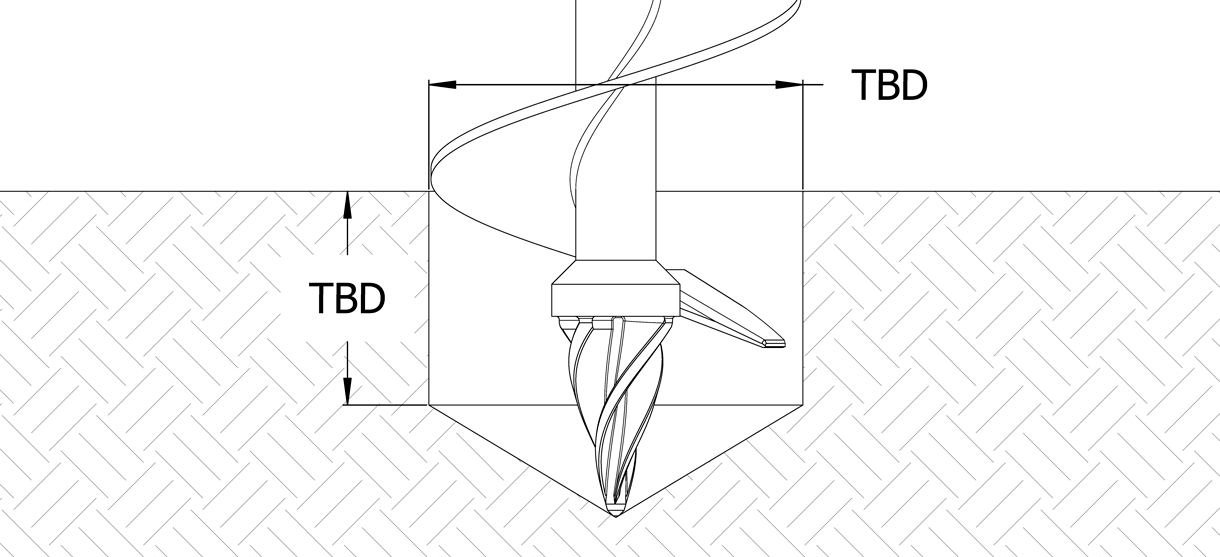
Center the auger on the installation mark and bore a hole to the required depth and diameter.
Ensure the area is properly formed to create a perimeter that will hold wet concrete.
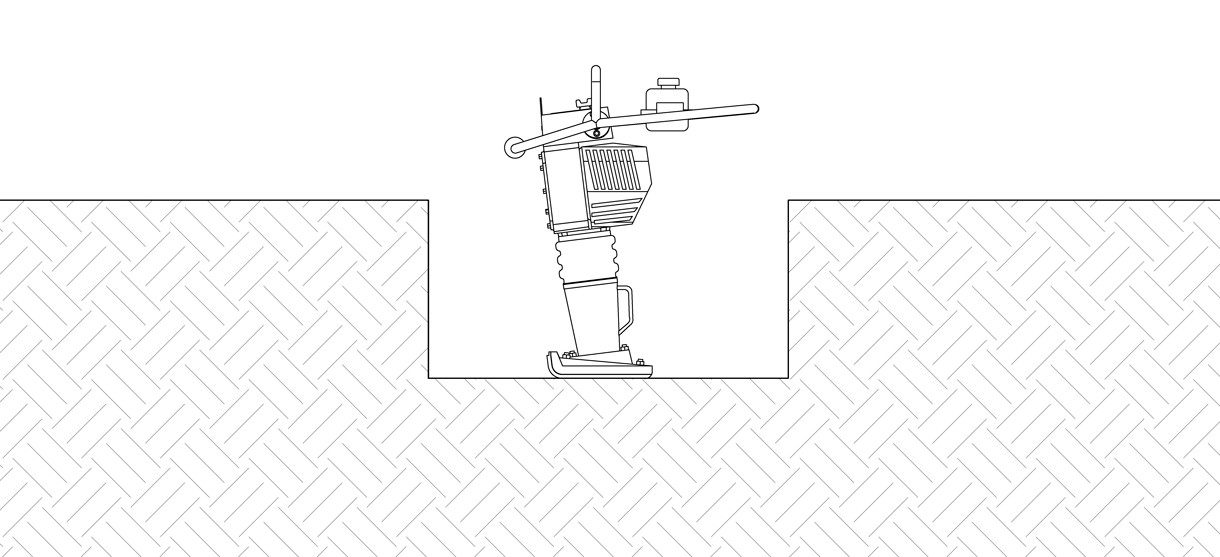
Use a dirt tamper to compact the soil below the intended surface.
Prepare the anchor casting for designated location
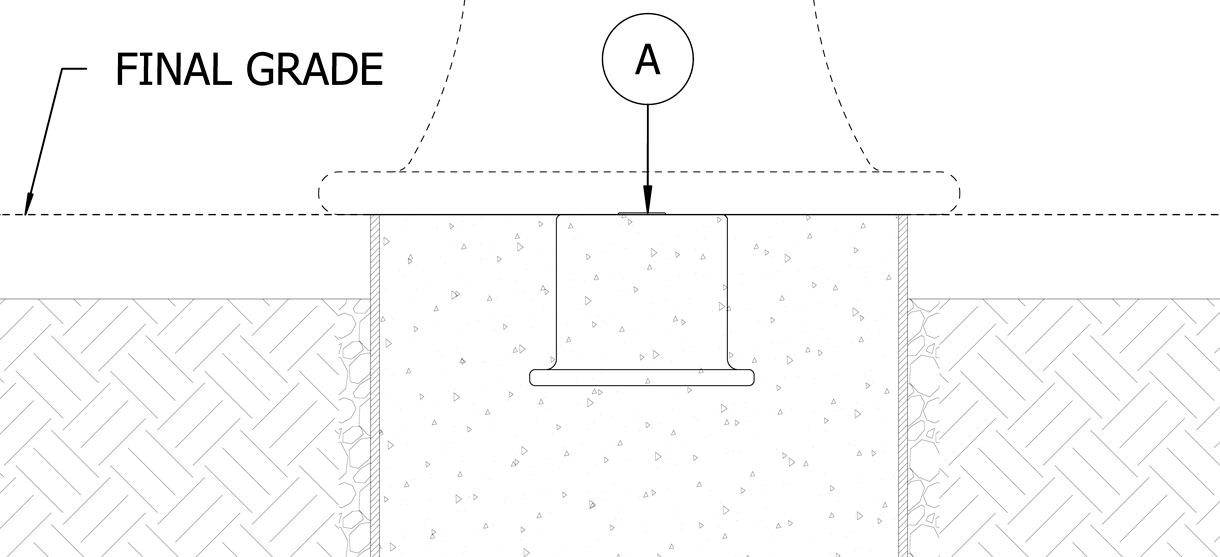
If the surrounding area is quite dirty or dusty, cover the bottom hole of the anchor casting with duct tape to prevent debris from entering the threaded area. The top hole should already be covered with the plug (A).
Place the anchor casting in designated location and ensure that the top of the casting will be flush with the finished surface of the concrete grade (the anchor casting is 4" high).
The top of the anchor casting must be level.
Pour The Concrete
Mix and pour the concrete
Ensure that the proper ratio of water and concrete mix is used—the concrete should have a similar texture to moldable clay.
Pour the concrete evenly, ensuring surface is level, and avoid disrupting the casting anchors.

Allow the concrete to cure
A minimum of 2–3 days should be given for concrete to cure before beginning construction projects on new concrete surfaces.
Note: Moisture in the environment and cool temperatures can significantly slow the process(1)
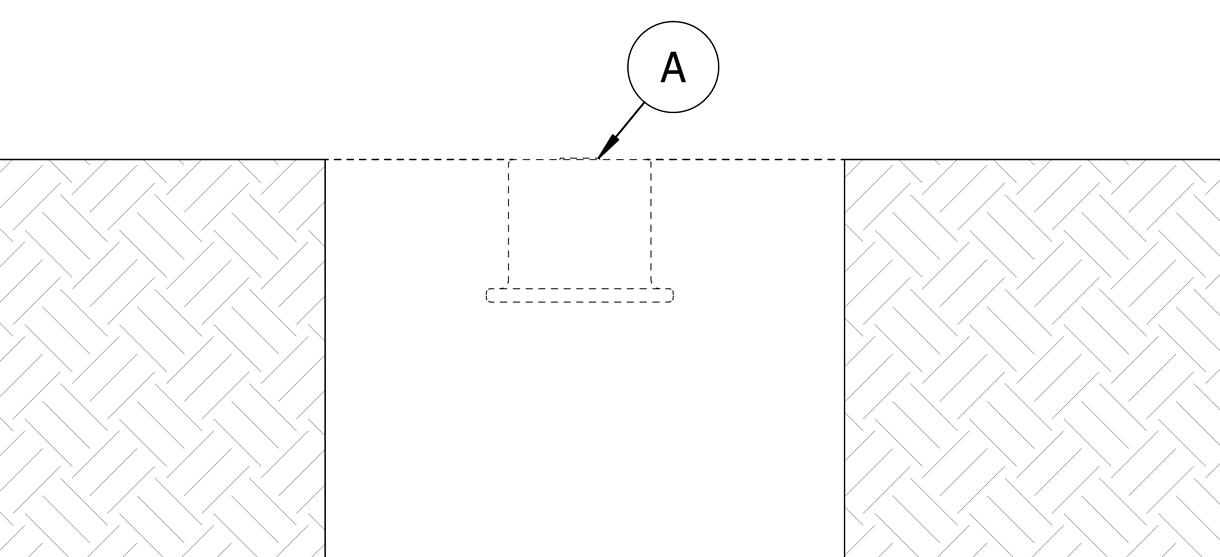
Using a concrete form
Note: If you are not using a concrete form, skip to the “Secure the Bollard” section.
Cut the tubed concrete form
Tubing must have a diameter that is equal to or larger than that of the bollard base.
Cut the tubed concrete form to the correct length so that when placed in the prepared site, its top will be flush with the finished surface.
Note: Remember, it is crucial to leave an allowance (TBD) at the top of the current surface as the landscaping material must still be added later. Consult with your landscaper to determine how much allowance is required.
Dig the site
Ensure that the diameter of the hole is large enough to hold the tubing.
Center an auger on the installation mark and bore a hole to required measurements.
Prepare tubed concrete form for concrete
Measure 4" down from the top of the tube and mark on the inside with the chalk or marker. This marks the embedment depth for the anchor casting.
Place the concrete form in the designated position. Ensure center of tubed form lines up with center point markings.
Use dirt or gravel to fill in any voids between the concrete form and the hole.
Pour the concrete
Mix and pour the concrete
Ensure that the proper ratio of water and concrete mix is used—the concrete should have a similar texture to moldable clay.
Pour the concrete into the concrete form until it reaches the previously marked embedment marking on the inside of the tubing.
Take care to pour the concrete evenly and avoid disrupting the concrete form.
Place the anchor casting in the form
Cover the bottom hole of the anchor casting with duct tape to prevent debris from entering. The top hole should already be covered with the plug (A).
Lower the anchor casting into the concrete form. The top of the anchor casting should be flush with the top of the concrete form and the intended finished surface.
Continue to pour the concrete until the concrete form if filled to the top.
Allow the concrete to cure
A minimum of 2–3 days should be given for concrete to cure before beginning construction projects on new concrete surfaces.
*Note that moisture in the environment and cool temperatures can significantly slow the process.
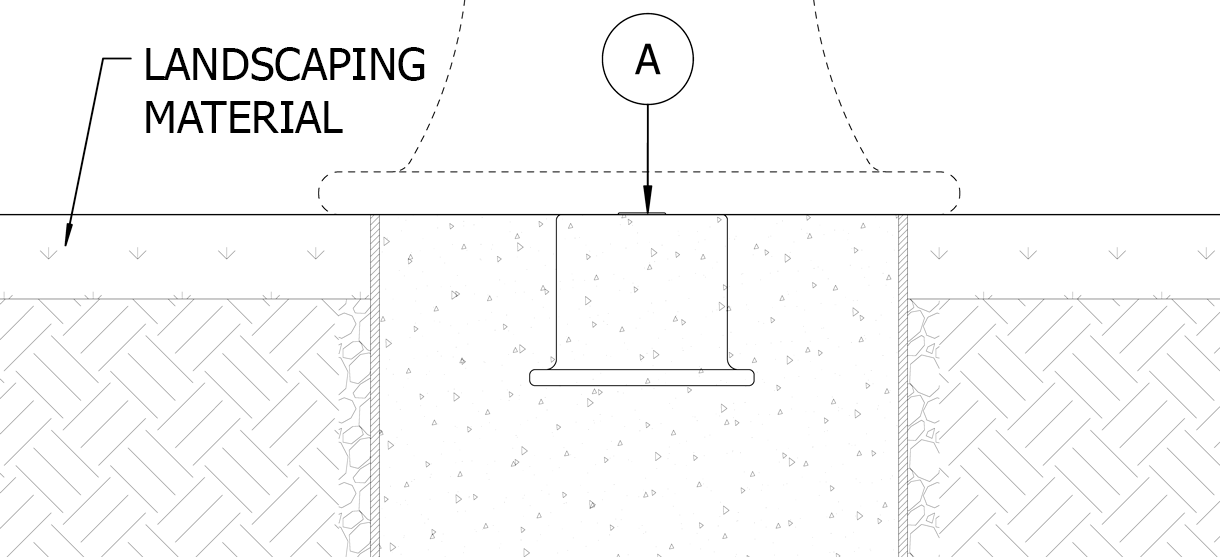
Apply the landscaping material
Once the concrete has fully cured, landscaping materials such as dirt, sand, and brick can be applied around the concrete form.
Secure the bollard
Place the bollard near the anchor casting
Keep the bollard in its protective packaging. After ensuring the concrete surface has fully cured, carefully place the bollard beside each anchor casting.
When ready to install, remove the bollard's protective packaging.
Remove the plug (A) from the top hole of the anchor casting.
Set the bollard over the anchor casting
Set the bollard base upright and maneuver it so the center lines up with the threaded hole in the anchor casting.
Lower the threaded rod and tighten
Lower the threaded rod through the bollard base.
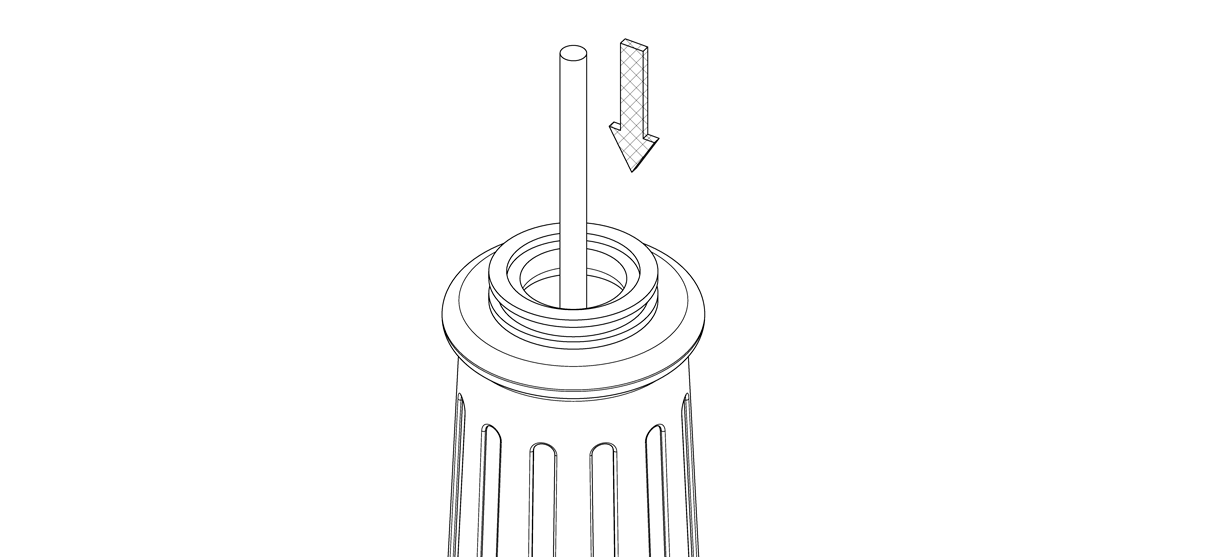
Continue to thread the rod into the anchor casting.
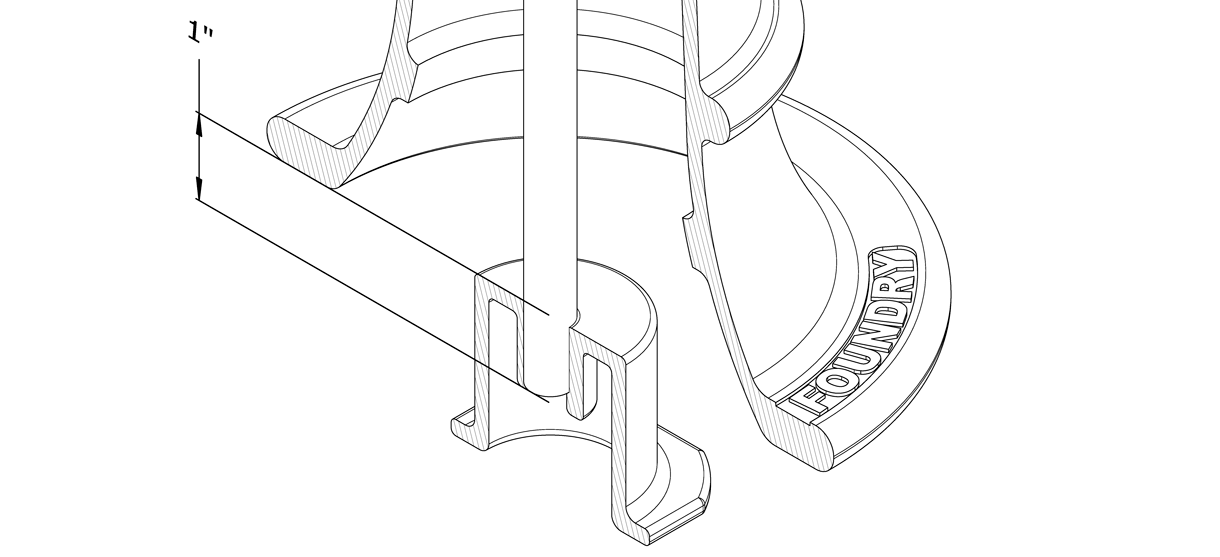
Tighten(1) the threaded rod by hand until it is secure in the anchor casting.
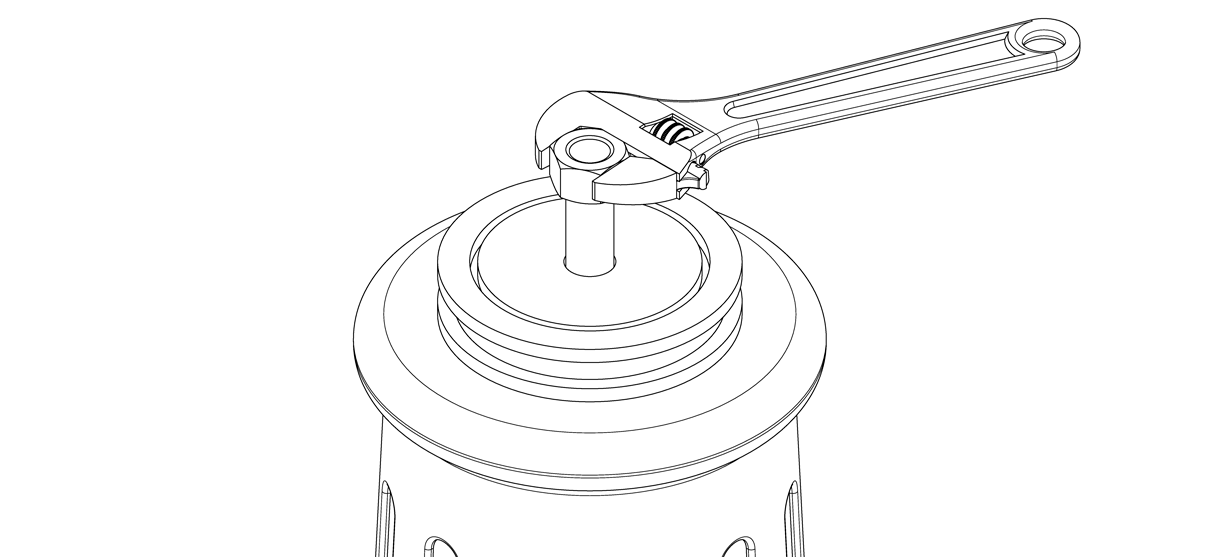
Secure the bollard
Place the washer over the threaded rod so that it rests on top of the shaft of the bollard.
Apply the 1" nut to the threaded rod and use a wrench to tighten until the bollard is secure.
Secure the bollard cap
Remove bollard cap from its packaging.
Place the cap on the top of the shaft of the bollard.
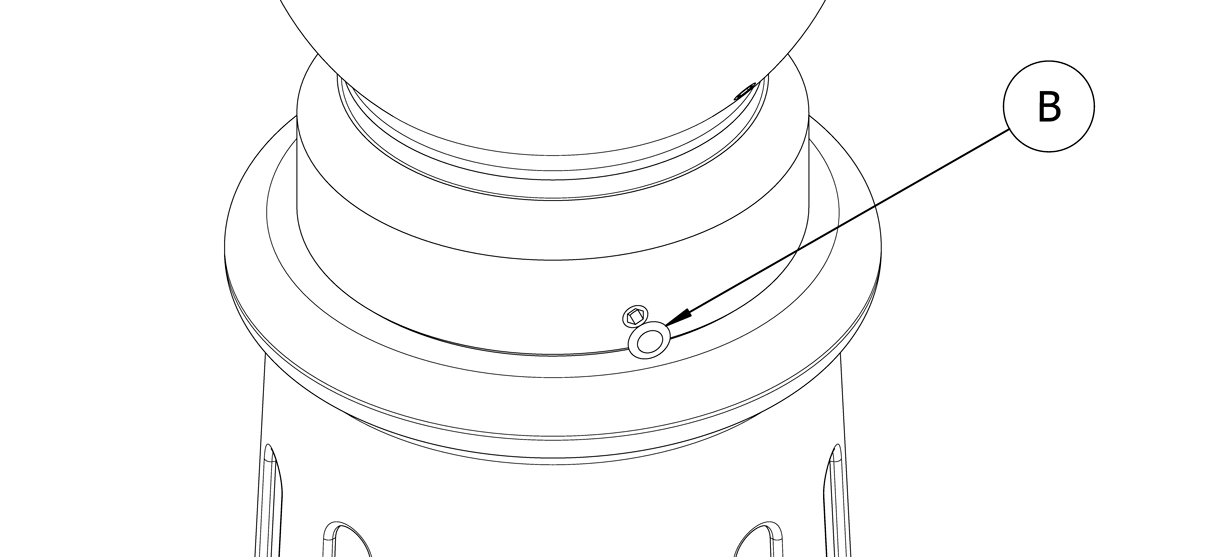
Secure and align the cap to the bollard base with the three set screws. Tighten in equal amounts to ensure that the cap remains centered.
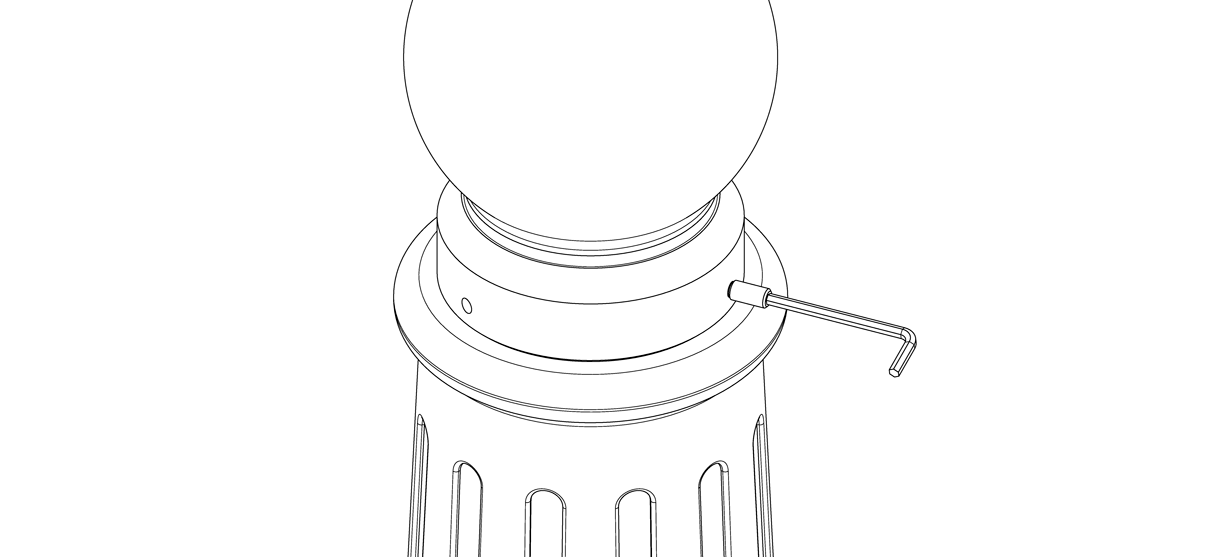
Place the plastic polyethylene plugs (B) over the set screws.
Inspect
Inspect the installation
From a distance, examine the plane of view.
Ensure the bollard is plumb.
Check the bollard for any signs of surface damage
Abrasions should be covered as soon as possible to prevent rust and ensure the proper life of the bollard. For damage repair or other servicing needs, please contact Reliance Foundry’s sales department.
Care and maintenance
Reliance Foundry manufactures its products to the highest design standards to ensure their durability. Reliance Foundry’s bollards are finished with long-lasting powder coating. In most North American environments, routine inspections and cleaning will ensure that bollards retain their aesthetic appeal. Proper care and maintenance are required to maintain the finish and ensure a full service life.
1. Recommended tightness is until the threaded rod reaches a depth of approximately 1″ in the anchor casting.