Installing Detectable Warning Plates
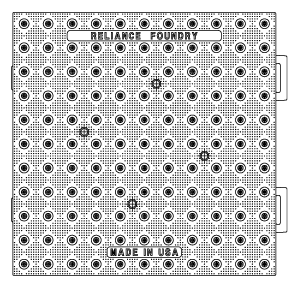
Reliance Foundry’s detectable warning plates help create safe, accessible urban streets for all pedestrians. Detectable warning plates can be used to guide the visually impaired by signaling changing levels and marking the transition between sidewalk and street.
Installation of detectable warning plates into concrete is simple and can be performed in just a few minutes. Two or more plates can be connected using the lock tabs and slots. Lifting springs and a construction pipe are used to lift and lower the plate into position.
PARTS LIST
|
# |
PART |
QTY |
|---|---|---|
|
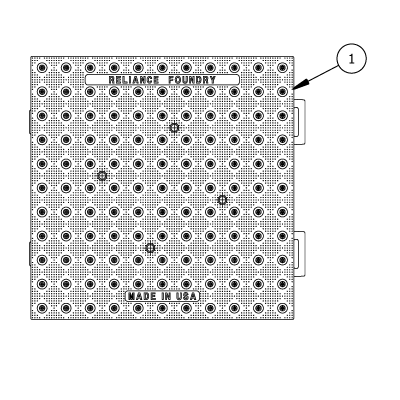
1 |
Detectable Warning Plate |
1 |
INSTALLATION EQUIPMENT
|
Lifting Springs (included in shipment) |
|
Metal Construction Pipe |
|
Shovel |
NOTE
- To protect the finish of painted plates, do not remove the thin, plastic packaging on the plates until after installation.
- Review current local, state, and national guidelines to ensure your installation and product are in full compliance.
Before installation
Check for hazards
Always check for hazards such as water pipes, gas lines, and underground wiring before digging.
Study the site plans
Site plans are generally created by the architect of the project.
Refer to site plans to locate the placement of the detectable warning plates.
Prepare concrete
Prepare concrete in accordance with municipal and federal ADA guidelines.
Pour the concrete and form the ramp.
Note: Small marks can be scribed on the concrete to show where the plates are to be set.
Connect multiple plates
The following steps are required only when connecting two or more plates. For single plate installation, skip over this section and move directly to installation.
Prepare the two plates
One end of the plate has lock tabs and the other end has lock slots.
Place two plates end to end so that the lock tabs and lock slots are lined up, and the lettering at the top of the plates read in the same direction.
Connect the plates
Lift the end with lock tabs and place the tabs into the lock slots of the second plate.
Lift one of the plates up approximately 6″ from the ground. The second plate should also lift up in tandem.
Slowly lower the plates back down. The plates should lower together smoothly as one connected piece. This motion locks the plates together.
Check the connection
The plates are in the correct position when they have a tight, flush seam.
Install the detectable warning plate
Apply lifting springs
Place lifting springs approximately 6″ from the end of the plate on each side.
Note: The same step applies for multiple plates—be sure to apply two liftings springs per plate.
Use a metal construction pipe, 2×4, or iron tube as the lifting bar. Ensure that it is strong enough to support the weight of the plate.
Place the lifting bar under the lifting springs, ensuring it is centered. By raising the bar, the plate will also lift off the ground. Use the lifting bar to move the plate to the designated site.
Note: This step requires heavy lifting. Be sure to have a minimum of 2 people for installation.
Install the plate
Lower the plate into wet concrete. Be careful not to get concrete onto the surface of the plate.
Once the plate is in the correct position, remove the lifting springs.
Press the plate firmly into wet concrete until flush with the surface of the concrete grade.
Wipe off any concrete from the plate’s surface and edges, and finish the concrete around the assembly.
Note: For painted plates, remove the thin, protective sheets off the plates at the end of the installation.
Inspect
Inspect the installation
Ensure the detectable warning plate is plumb to the surface, and the edges are flush with the surface grade.
Care and maintenance
Reliance Foundry manufactures its products to the highest design standards to ensure their durability. Reliance foundry’s detectable warning plates have either a natural finish or long lasting yellow paint. Unpainted detectable warning plates are maintenance-free, and for painted versions, we recommend basic care and maintenance to ensure a full service life.