Installing Crash-Rated Bollards in New Construction
Reliance Foundry’s crash-rated bollards are engineered to ASTM standards and will withstand various vehicle weights and speeds (dependent on the model). They have strong stopping power and impact resistance, to keep pedestrians and storefronts safe by preventing dangerous vehicle intrusion.
Installation is easy with no assembly or specialty subgrade required. For enhanced aesthetics, bollard covers can be placed over crash-rated bollards.
What you will need
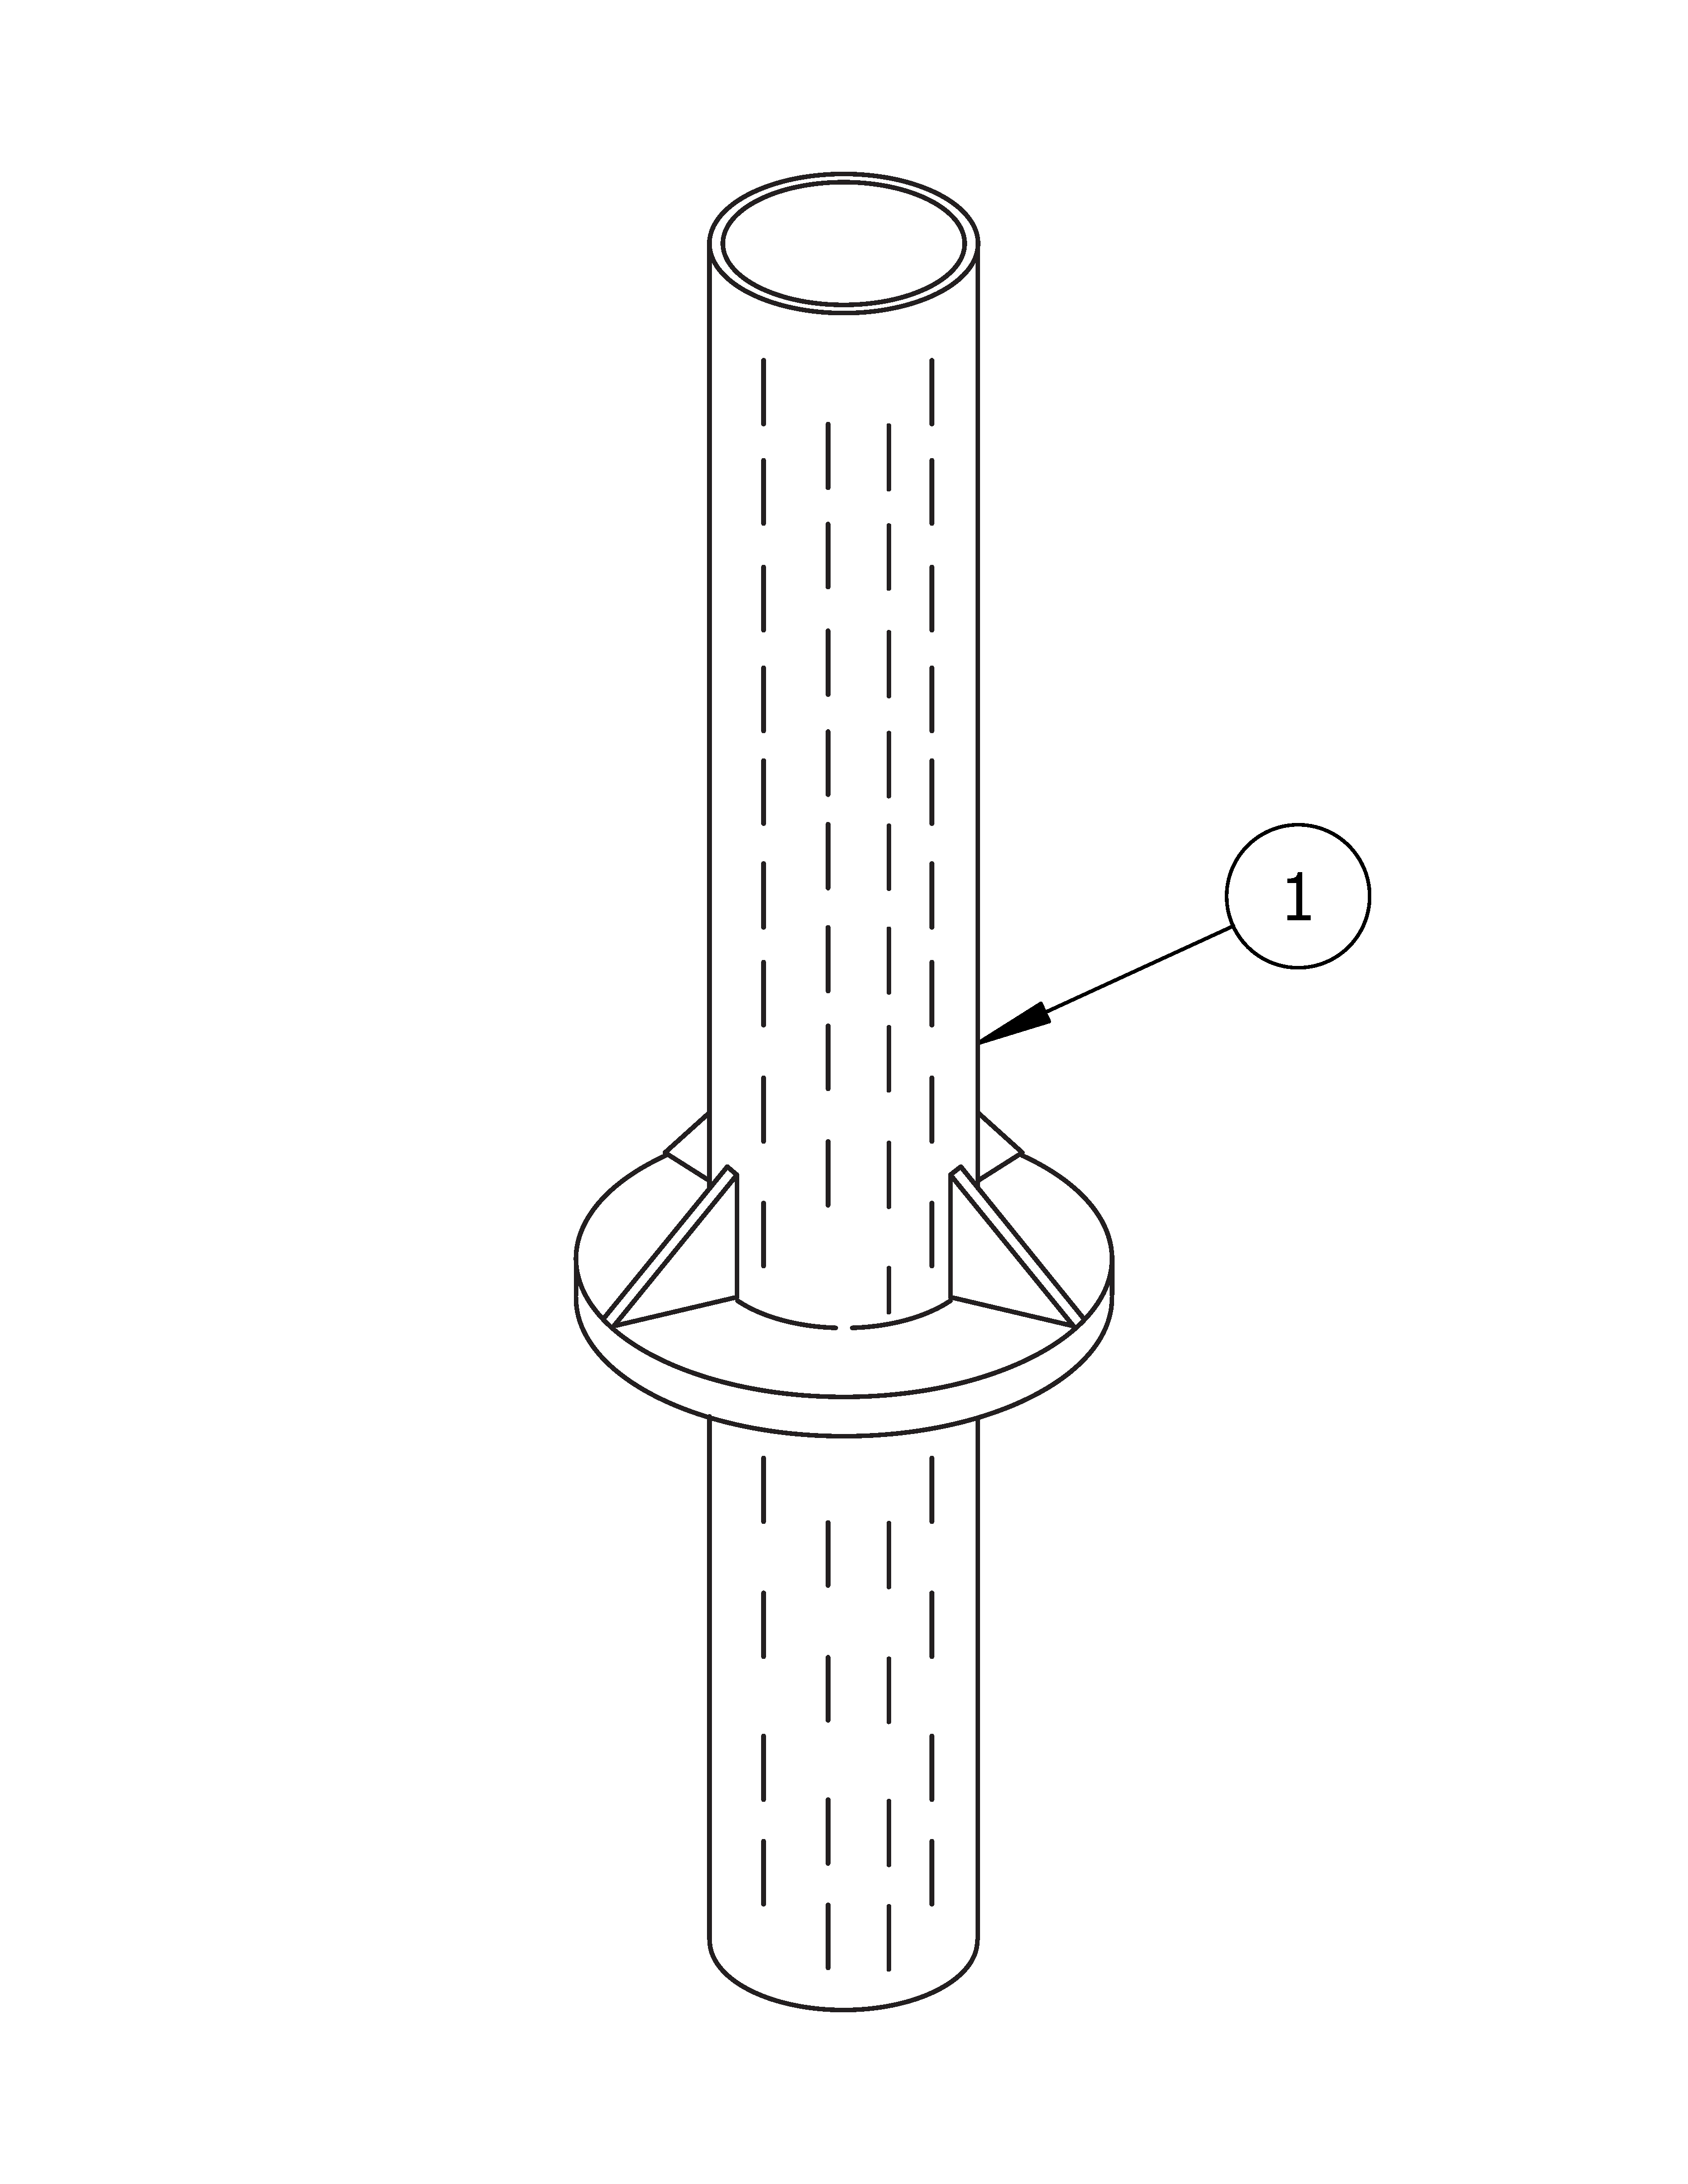
PARTS LIST
|
# |
PART |
QTY |
|---|---|---|
|
1 |
Crash-Rated Bollard |
1 |
INSTALLATION EQUIPMENT
|
Auger |
Chalk |
|
Dirt Tamper |
Measuring Tape |
|
Level |
|
NOTE
- To protect the finish, keep bollards in original packaging until the exact moment of installation.
- Handle with care to avoid scratching or damaging bollard surfaces as abrasions will lead to rust.
- Once scratched, bollards cannot be repaired to original form without re-finishing the entire surface.
Before installation
Study the site plans
Study the site plans and mark the intended location of each bollard on the plan.
Check for hazards
Always check for hazards such as water pipes, gas lines, and underground wiring before digging.
Note: You may need a permit to dig to certain depths or in certain locations.
Prepare the site for concrete
Plan the layout and then dig a rectangular hole with the required dimensions.
Note: The dimensions of the hole differ based on the bollard model. Refer to product drawings to determine specific measurements.
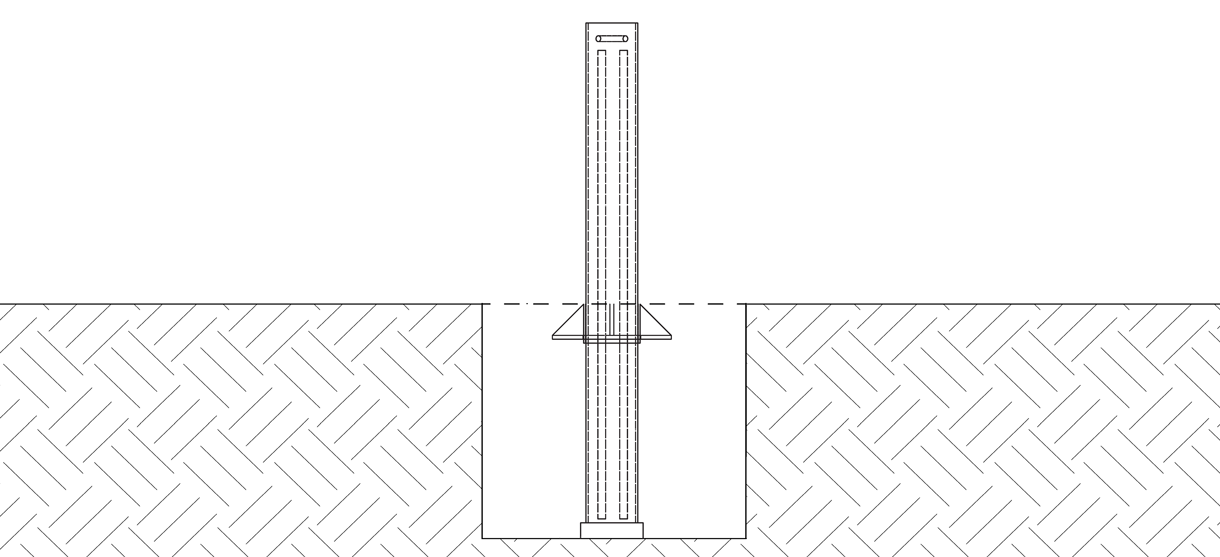
Set the brace
Set a brace (concrete block or chair) at the bottom of the site.
This will elevate the bollard off the subgrade.
The bollard should be lifted up enough that the top of the bollard’s gusset is flush with the surface grade.
Note: Check the product drawing to determine what the bollard height should be above grade.
Lower the bollard
Lower the bollard into the site and onto the brace.
Note: Crash-rated bollards are heavy—to prevent accidents and injuries, ensure the proper resources are available to set into place.
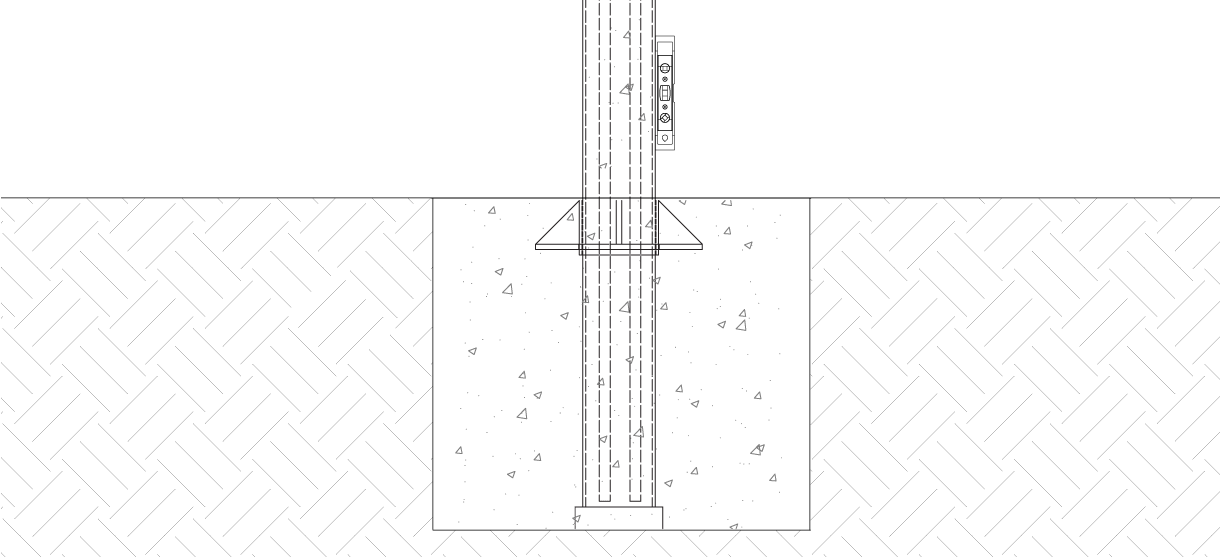
Pour The Concrete
Mix and pour the concrete
Ensure that the proper ratio of water and concrete mix is used.
The concrete should have a similar texture to moldable clay.
Note: The concrete requires a minimum PSI. Please refer to the product drawing to determine the PSI.
Fill the site to the top with concrete until it is level with the surface grade.
Set the Bollard
Ensure the bollard is plumb
Hold a level against the side of the bollard and ensure that it is plumb.
Note: Once the concrete has cured, there will be no way to make any adjustments.
Patch the surface around the bollard to make it smooth with the existing surface.
Clean the bollard
Use a cloth to clean the bollard before the concrete cures.
Allow the concrete to cure
Be sure to allow enough time for concrete to cure before beginning construction projects on new concrete surfaces.
Note: Moisture in the environment and cool temperatures can significantly slow the process.
Landscaping material or concrete can be applied around the bollard base to achieve the desired final grade.
Note: Decorative bollard covers can be installed over crash-rated bollards. Please ensure that the cover is large enough to accommodate the crash-rated bollard. To install, please refer to the cover’s installation guide.
Inspect
Inspect the installation
From a distance, examine the plane of view.
Ensure the bollard is plumb to the surface, and the surface is flat.
Check the bollard for any signs of surface damage
Abrasions should be covered as soon as possible to prevent rust and ensure the proper life of the bollard. For damage repair or other servicing needs, please contact Reliance Foundry’s sales department.
REMOVING THE BOLLARD (FOR REMOVABLE OPTIONS)
Some bollard models can be removed when necessary and covered with a bollard cap.
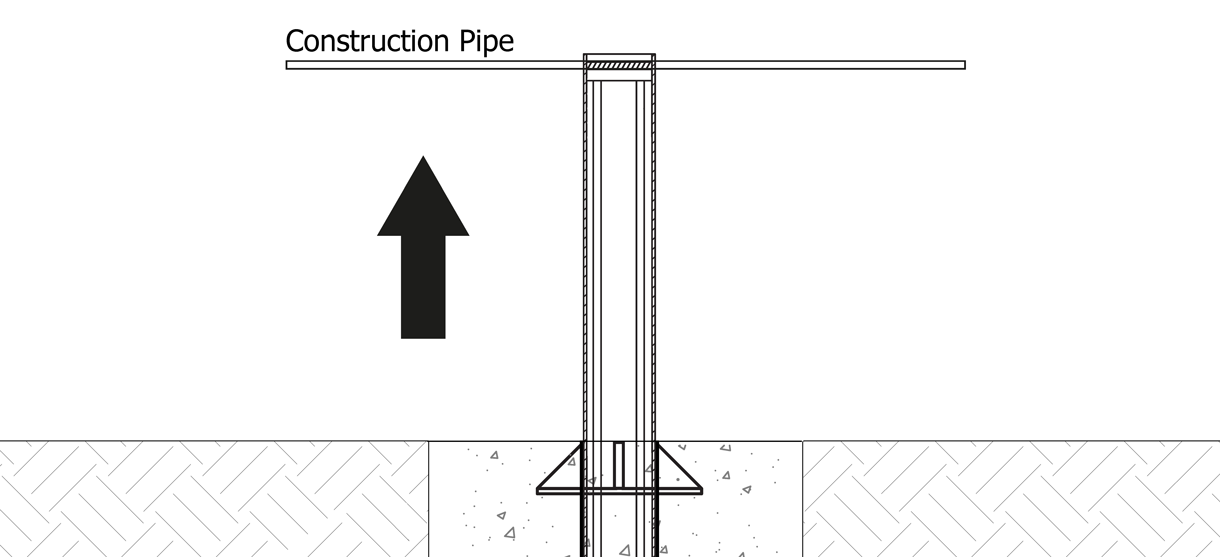
Lift the bollard
Find the hollow internal tube at the top of the bollard.
Insert a construction pipe through this tube and ensure it is centered. The construction pipe will act as a lifting handle.
Raise the construction pipe and lift the bollard out of the bollard sleeve. Note: Crash-rated bollards are heavy—to prevent accidents and injuries, ensure the proper resources are available for lifting.
Install the bollard cap
Cover the opening of the bollard sleeve with the bollard cap to prevent tripping hazards and debris from getting inside.
