Installing Flexible Bollards using Removable Mountings
Flexible bollards will bend up to 90° upon impact to reduce damage to vehicles. Reliance Foundry carries a select line of flexible bollards that can be set in removable mountings. This makes them ideal for traffic applications where access needs may fluctuate. With a sleek and efficient keyed box receiver, the flexible bollard can be removed by simply turning a key and lifting the bollard.
Flexible bollards installed in this manner are ideal for lane demarcation or for creating architectural perimeters that are traffic friendly. It is important to note that with this installation method, the bollard will offer little impact resistance.
Please refer to the product drawing for each specific model to determine some of the measurements in this installation guide.
PARTS LIST
|
# |
PART |
QTY |
|---|---|---|
|
1 |
Flexible Bollard, Removable Mount |
1 |
|
2 |
Receiver |
1 |
|
3 |
Reflective Tape (optional) |
1 |
INSTALLATION EQUIPMENT
|
Auger |
Dirt Tamper |
|
Level |
Chalk/Marker |
|
Measuring Tape |
|
NOTE
- To protect the finish, keep bollards in original packaging until the exact moment of installation.
- Handle with care to avoid scratching or damaging bollard surfaces.

Before installation
Study the site plans
Site plans are generally created by the architect of the project.
Refer to site plans to locate the precise center point of each bollard.
Ensure that the plan coincides with the site and familiarize yourself with the intended arrangement of the bollards.
Check for hazards
Always check for hazards such as water pipes, gas lines, and underground wiring before digging.
Prepare the site for concrete
Please consult your local Building Code Department to determine the recommended digging depth below the frost line in your area.
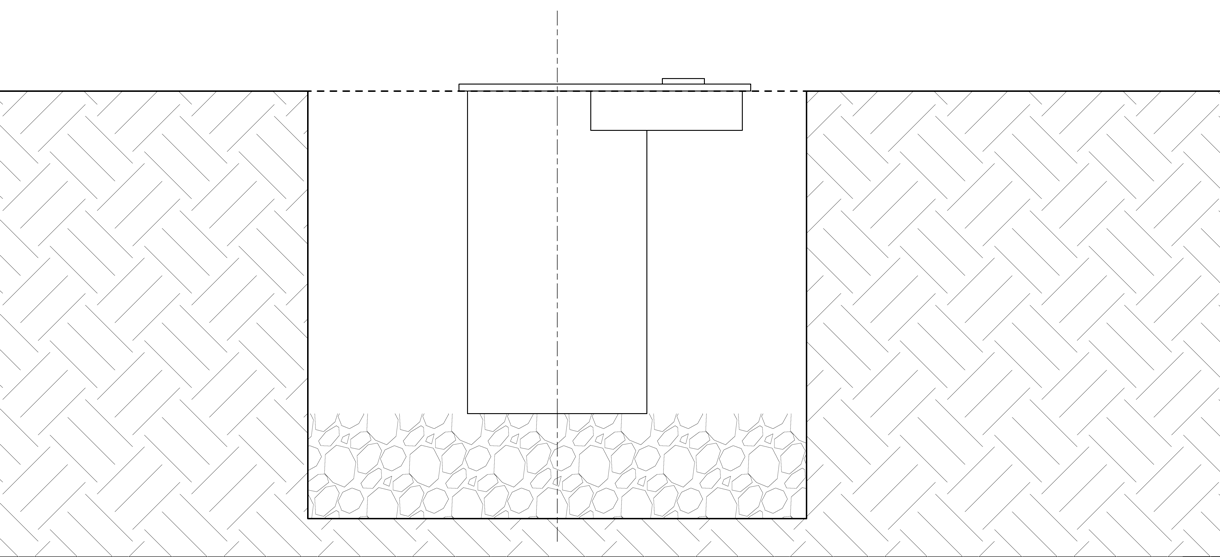
Dig below the recommended digging depth—or to the required depth for the bollard—whichever is greater.
Note: The required depth for the bollard differs based on the bollard model. Refer to product drawings to determine specific depth measurements.
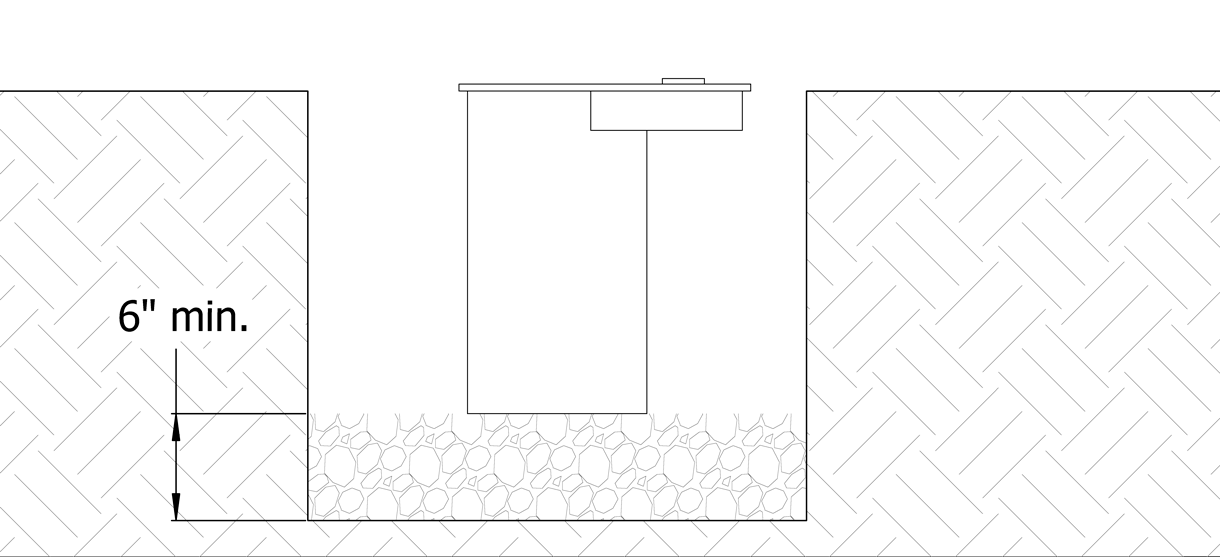
After determining this depth, add the required depth(1) for holding the drain rock—this combination is the total digging depth.
The diameter of the hole should extend a minimum of 2″ from all points of the receiver.
Dig the site
Center an auger on the installation mark and bore a hole to required measurements.
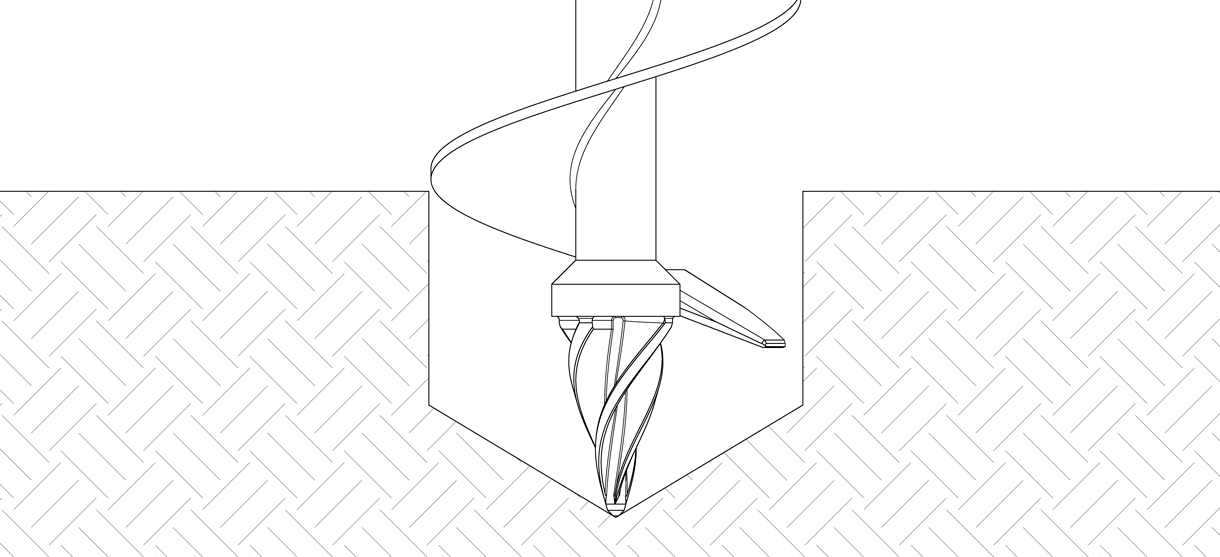
Ensure the area is properly formed to create a perimeter that will hold wet concrete.
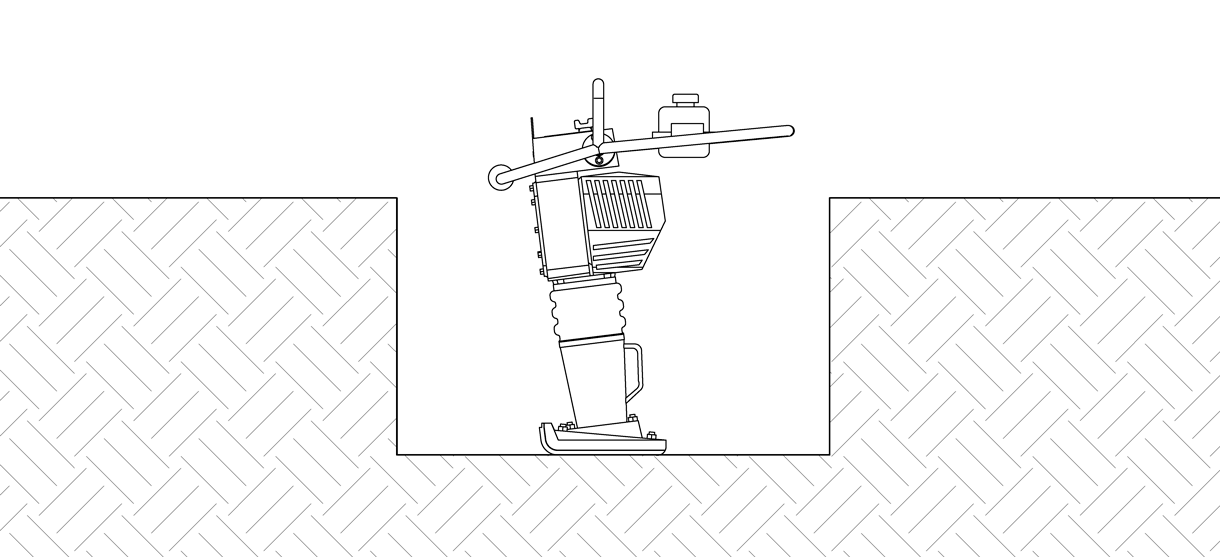
Use a dirt tamper to compact the soil below the intended surface.
Prepare the bollard and removable mount for designated location
Keep the bollard in its protective packaging.
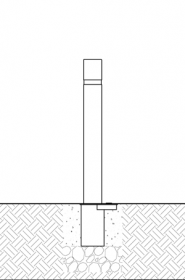
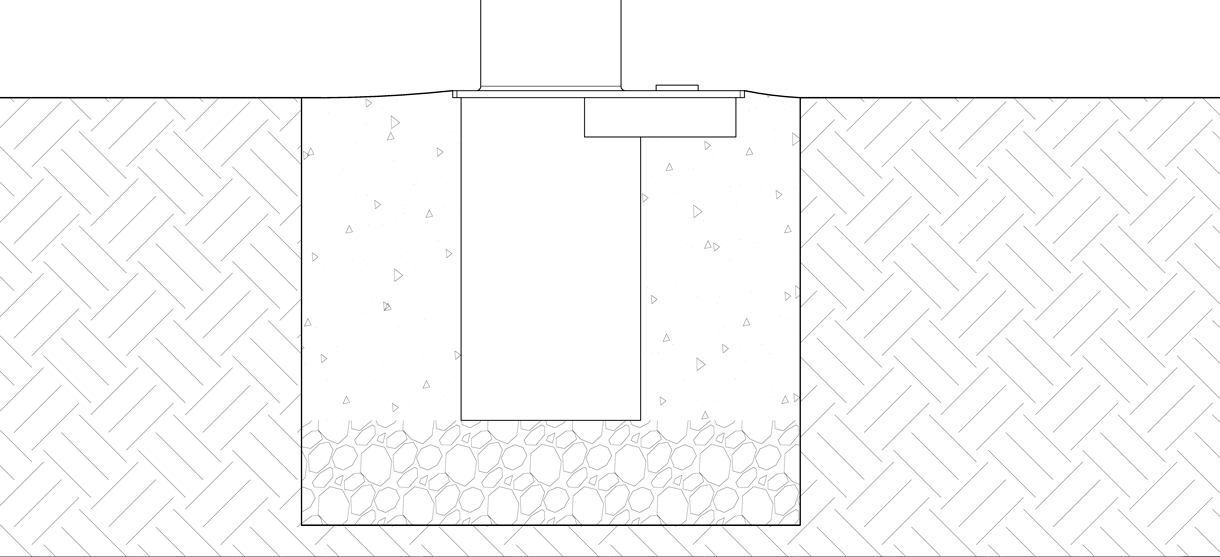
Keep in mind that the receiver will be installed so that the top of the receiver will be flush with the finished surface of the concrete grade.
Add the drain rock
Add the drain rock to the installation site.
Pour the concrete
Mix the concrete
Ensure that the proper ratio of water and concrete mix is used.
The concrete should have a similar texture to moldable clay.
Place the receiver in designated location
Lower the receiver into the designated location so that the top of the receiver is level with the finished surface of the concrete grade.
Note: If necessary, temporarily insert the bollard (with packaging still on) into the receiver and use a level to ensure it is plumb.
Pour the concrete
Take care to pour the concrete evenly, ensuring the surface is level.
Note: If the frost line is greater than the depth of the receiver, be sure to provide adequate drainage by piping through the concrete and connecting to the drain rock layer underneath.
Allow the concrete to cure
A minimum of 2–3 days should be given for concrete to cure before beginning construction projects on new concrete surfaces.
Note: Moisture in the environment and cool temperatures can significantly slow the process.
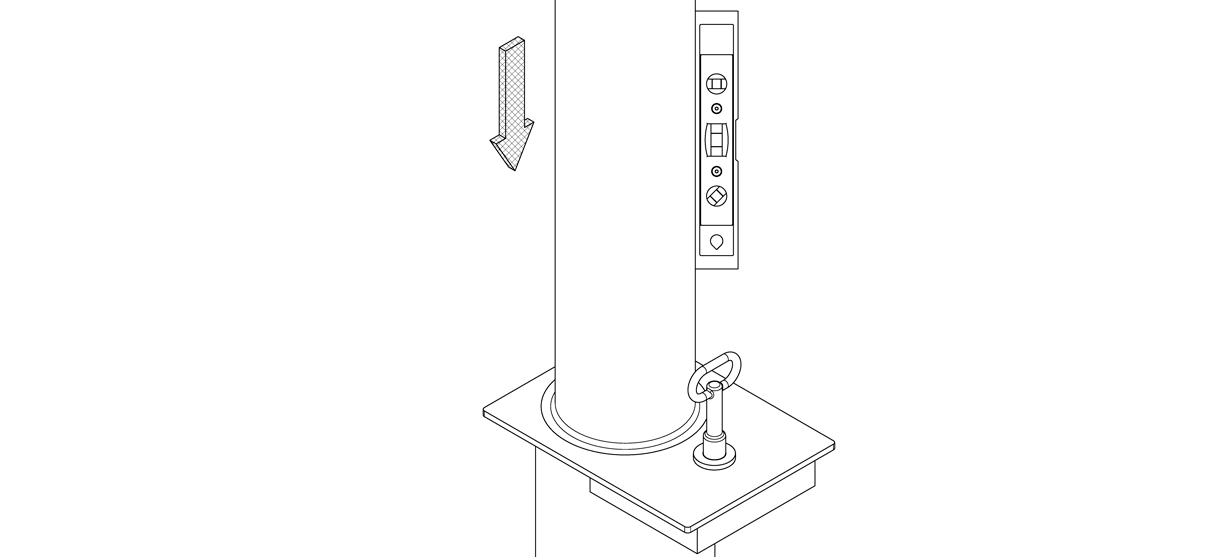
Install the bollard
Place the bollard in the receiver
Ensure the concrete has cured.
Keep the bollard in its protective packaging. Carefully set the bollard near the installation site.
When ready to install, remove the protective packaging and lower it into the receiver.
To lock the bollard in place, insert the key into the socket and turn.
Inspect
Inspect the installation
From a distance, examine the plane of view.
Ensure the bollard is plumb.
Check the bollard for any signs of surface damage
For damage repair or other servicing needs, please contact Reliance Foundry’s sales department.
Care and maintenance
Reliance Foundry manufactures its products to the highest design standards to ensure their durability. Reliance Foundry’s bollards are finished with long-lasting powder coating. In most North American environments, routine inspections and cleaning will ensure that bollards retain their aesthetic appeal. Proper care and maintenance are required to maintain the finish and ensure a full service life.
1. Recommended depth for drain rock is a minimum of 6″. Depth will also depend on local soil conditions, weather conditions, and engineering requirements.