R-6101 Crosswalk Bollard Installation
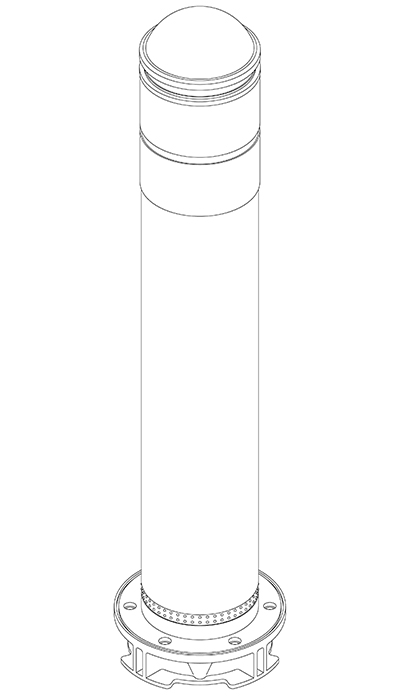
Reliance Foundry’s R-6101 crosswalk bollard is designed to alert distracted walkers as they approach intersections. This bollard has a lit cap that changes from red to green with the pedestrian crossing traffic lights, informing pedestrians when it is safe to cross the street.
Materials and Equipment Needed
|
Tools for Drilling |
Appropriate for desired installation location. Must be able to drill a hole 200 mm [7.87"] in diameter minimum |
|
Disk Cutter |
Appropriate for desired installation location |
|
Blowtorch |
|
|
Glue – Sikadur 42 SP |
Or equivalent; not provided by Reliance Foundry |
|
Ground Material |
Appropriate for the location. For covering the electrical lines after installation. |
|
4 Conductor Cable |
Appropriate for the location. Please consult your electrical engineer. |
NOTE
- To protect the finish, keep bollards in original packaging until the exact moment of installation.
- Handle with care to avoid scratching or damaging bollard surfaces.
Before installation
Study the site plans
Study the site plans and confirm location of the bollard.
Check for hazards
Always check for hazards such as water pipes, gas lines, and underground wiring before digging.
Note: You may need a permit to dig to certain depths or in certain locations.
Drill hole for bollard and electrical connection
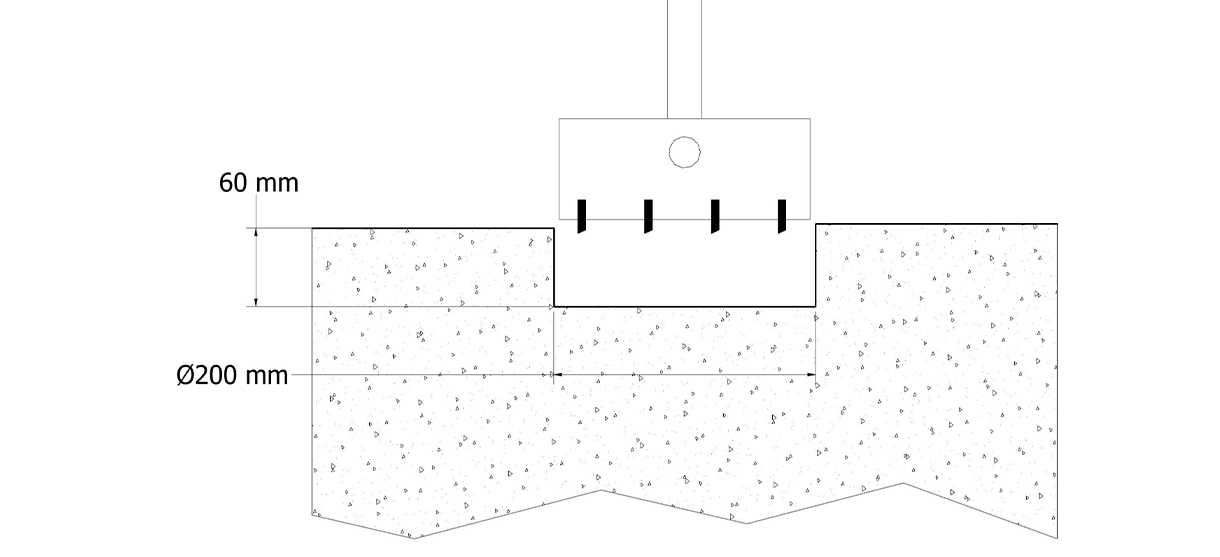
Drill a hole in the desired location with a minimum diameter of 200 mm [7.87"] and a depth of 60 mm [2.36"]
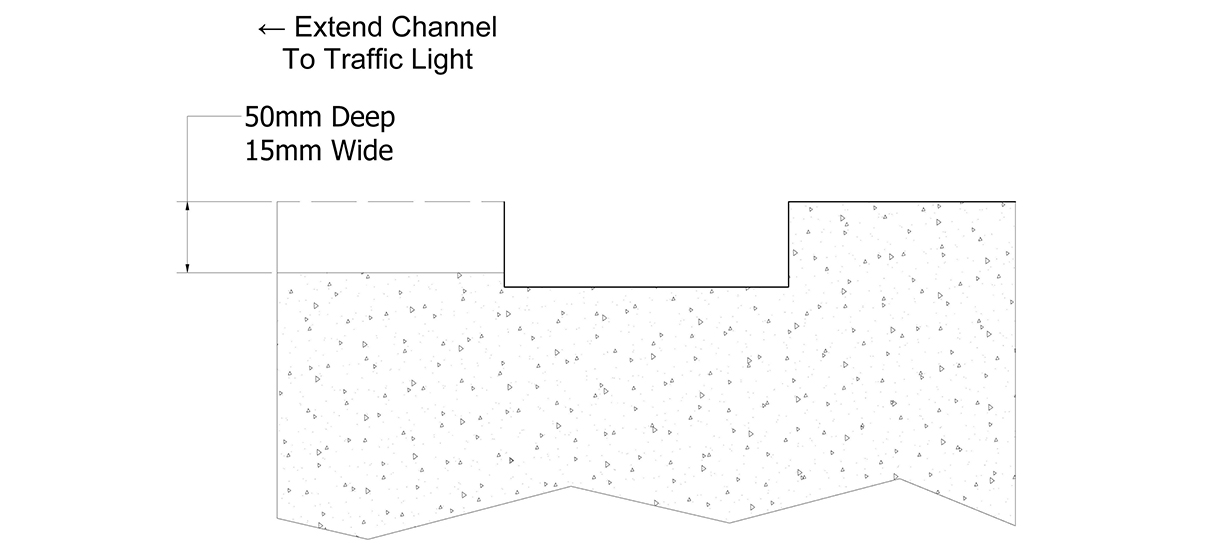
Using a disk cutter, open a hole that is 15 mm [0.59"] in width and 50 mm [1.97"] in depth for connecting the bollard to the nearby traffic light.
Brush away any dust and debris from the holes.
Dry the hole with a blowtorch to remove any moisture.
Place Bollard
Following manufacturer’s instructions, pour glue Sikadur 42 SP until it reaches half the height of the hole where the bollard will lie.
Insert the bollard into the hole and clean away any excess glue.
Check bollard is vertically straight and in the correct orientation.
Allow the glue to dry completely as per manufacturer’s instructions.
Electrical Installation
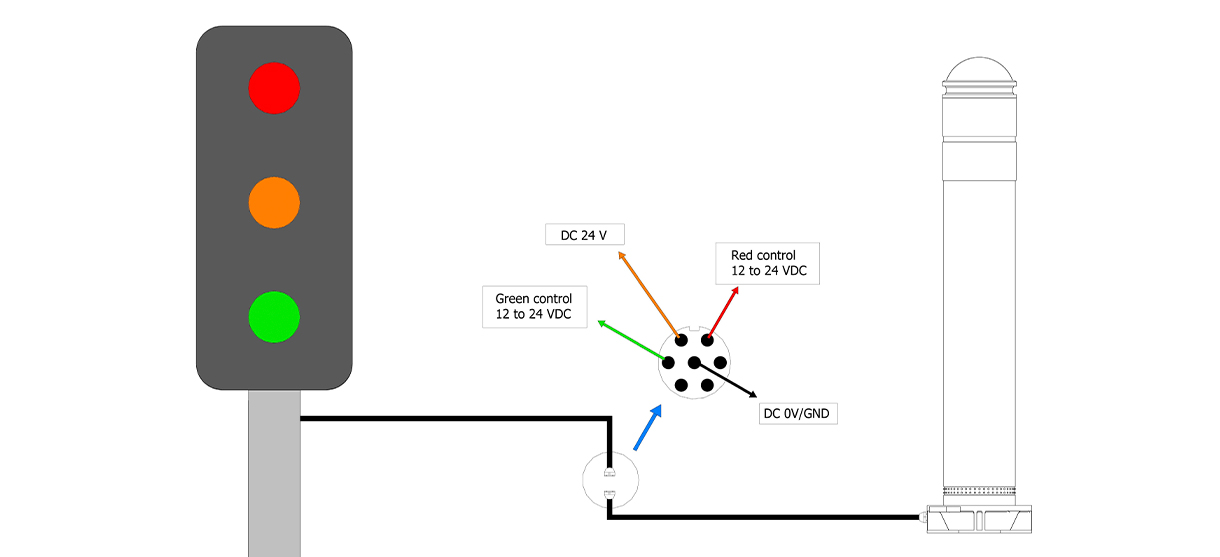
Connect the wires from the bollard to the traffic light controller.
- The connection can be done from a control box, or from the light signal directly.
- The connector used is an SP21 Aviation Plug.
- See the diagram and table below for how to connect the pins of the connector.
| Pin number | Traffic light (signal) | Control box (PLC) |
|---|---|---|
|
1 |
Connect this pin to the main 24V DC power source . |
Connect this pin to the main 24V DC power source. |
|
2 |
Connect this pin to the DC line that turn on the red signal. |
Connect this pin to PLC pin that turn on the red signal. |
|
3 |
Connect this pin to the DC line that turn on the green signal. |
Connect this pin to PLC pin that turn on the green signal. |
|
4 |
Connect this to the main Ground of the DC power source. |
Connect this to the main Ground of the DC power source. |
Cover the channel for the wires with the appropriate material for the location and allow to dry or cure completely.
Inspect
Inspect the installation
From a distance, examine the plane of view.
Ensure the bollard is plumb.
Check the bollard for any signs of surface damage
For damage repair or other servicing needs, please contact Reliance Foundry’s sales department.
Care and maintenance
Reliance Foundry manufactures its products to the highest design standards to ensure their durability. Reliance Foundry’s bollards are finished with long-lasting powder coating. In most North American environments, routine inspections and cleaning will ensure that bollards retain their aesthetic appeal. Proper care and maintenance are required to maintain the finish and ensure a full service life.
